I hope you’re enjoying my Patchwork Duffle pattern. I have been relishing the cute photos shared on Instagram. If you’ve been wondering about adding a carrying strap, then you’re in luck! I’ve got some tips that should help you in doing that. If you don’t have the pattern I offer Paper copies as well as PDF copies!
I have a YouTube Video that outlines the same steps included in this article, linked below. Hopefully between the two you will achieve a happy little carrying strap for your Patchwork Duffle.
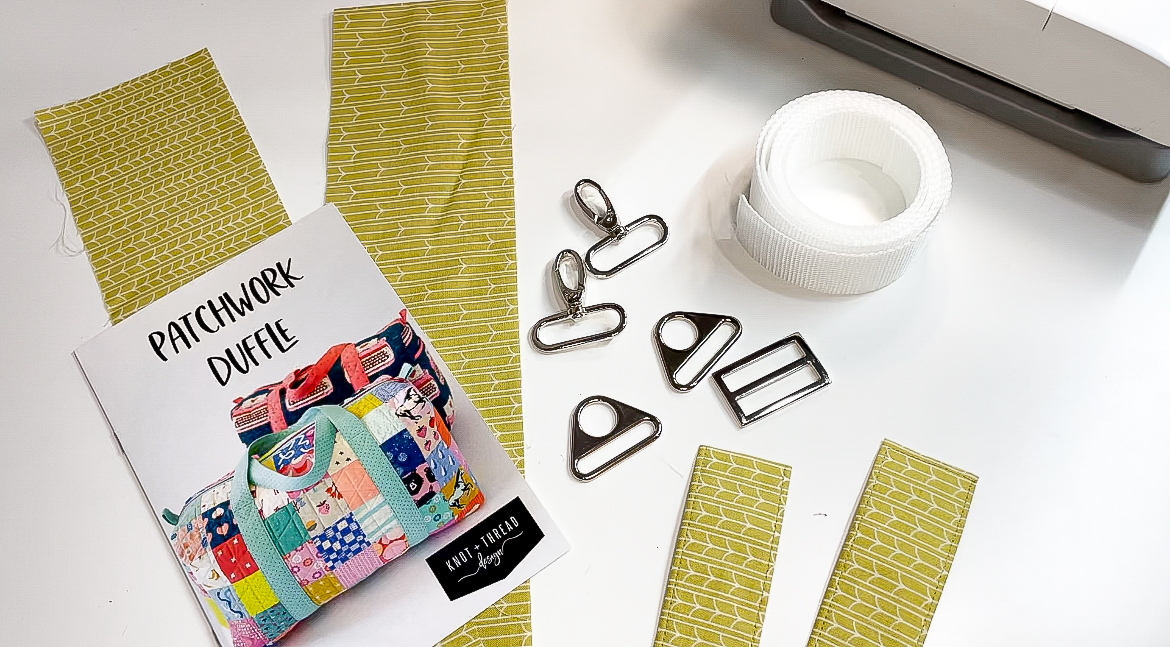
To get started, here are the additional supplies you will need to create your carrying strap:
2: 1.5” Triangle Rings
2: 1.5” Swivel Hooks
1: 1.5” Strap Adjuster
60” of strapping (whatever you are using to make your handle straps—cotton webbing or polypro to cover)
If you are covering your strapping with fabric, you will also need to make the following cuts from your handle fabric:
1: 3 3/4” strip by WOF
1: 3 3/4” strip by 23”
AND if you just need a hardware set you can get that here.
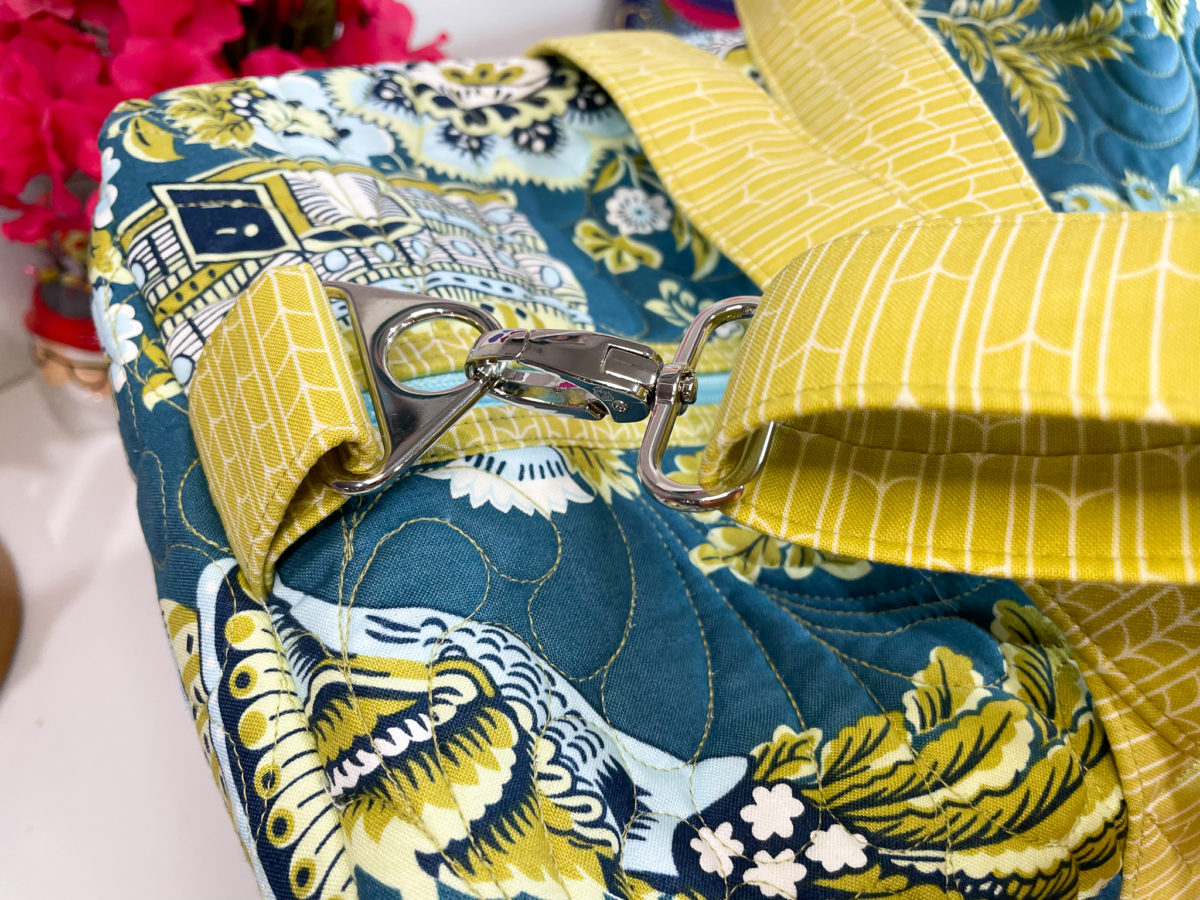
Now that you have these supplies gathered, lets get started! Follow all the steps of the pattern until you get to the step to attach the Zipper Tabs. Before you stitch down the zipper tab, thread a Triangle Ring through it. Bring the raw edges together with seam side of the strapping together and stitch 1/8” in place to keep edges together.
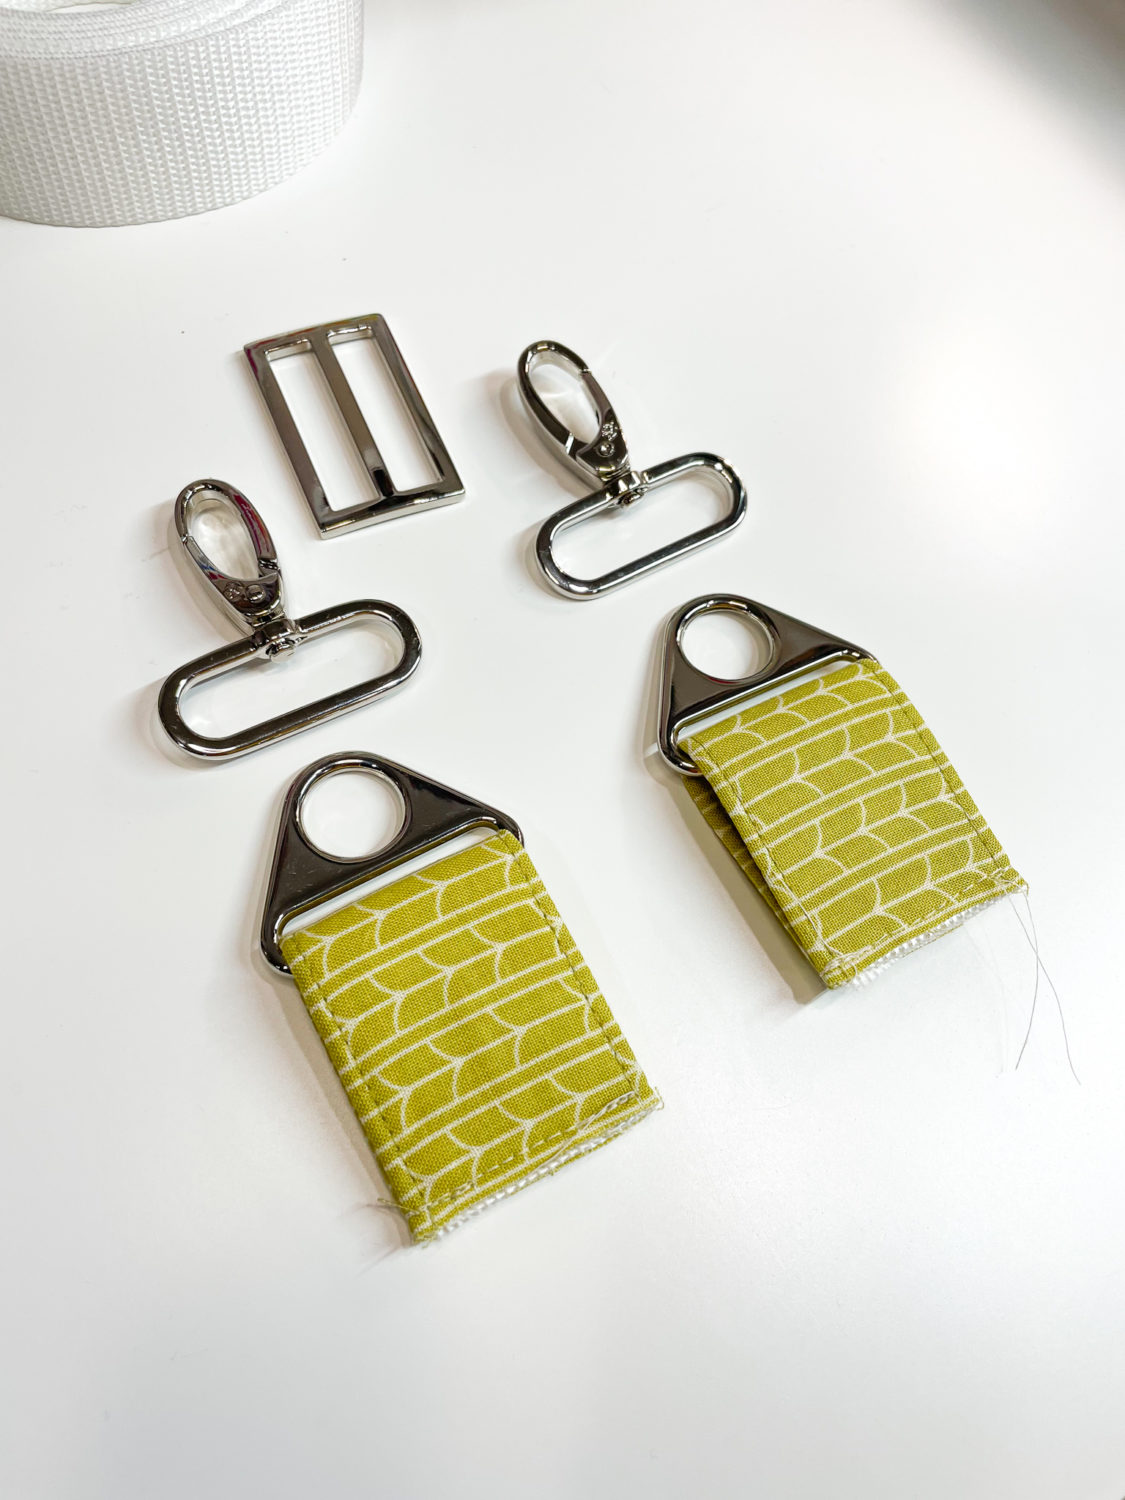
Now attach the Zipper Tab to the bag as instructed in the pattern and complete the bag!

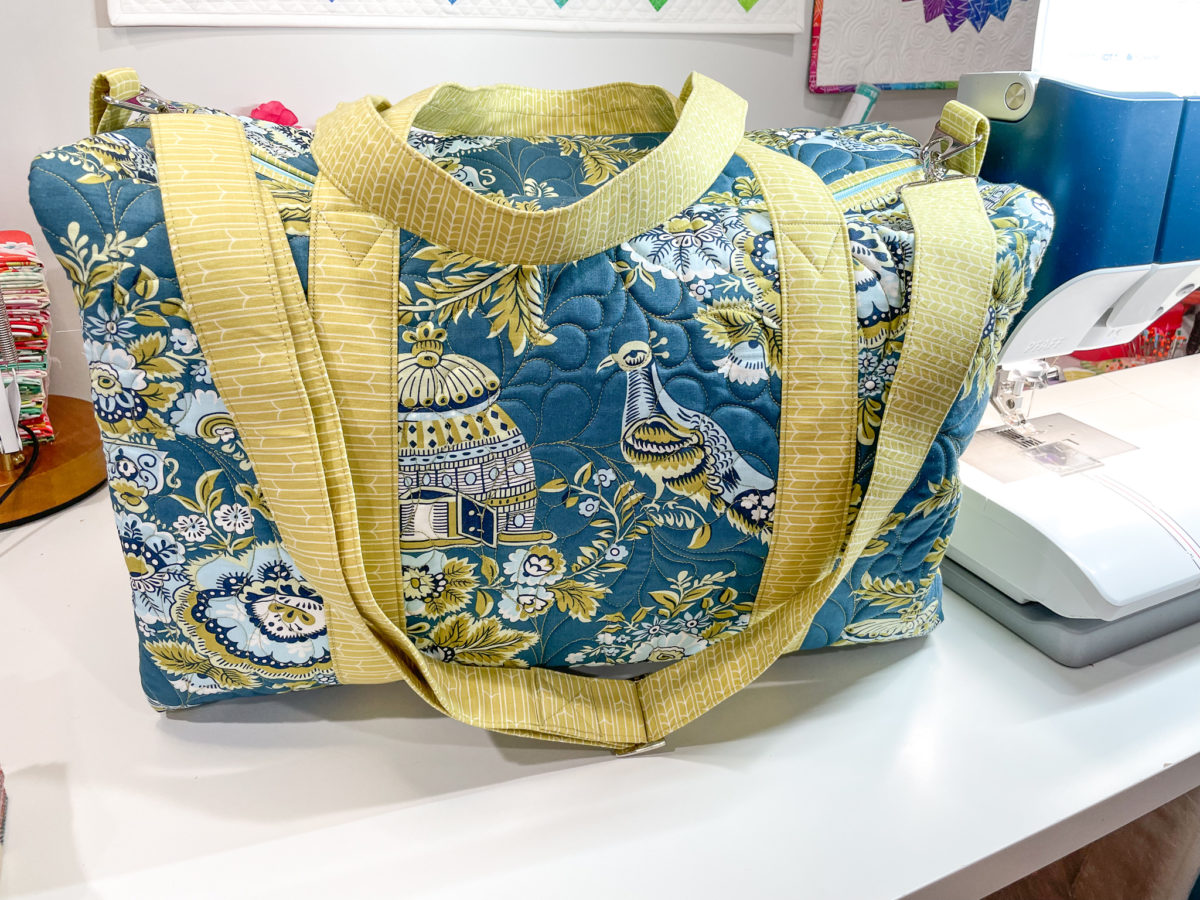
We will now make the Carrying Strap. In the same manner as you made the Handle strap in the pattern, you will make the Carrying strap.
Pull the 60” piece of strapping through your fabric tube. Trim excess fabric 1” past the strapping and tuck raw edge into the tube. Topstitch Carrying Strap.
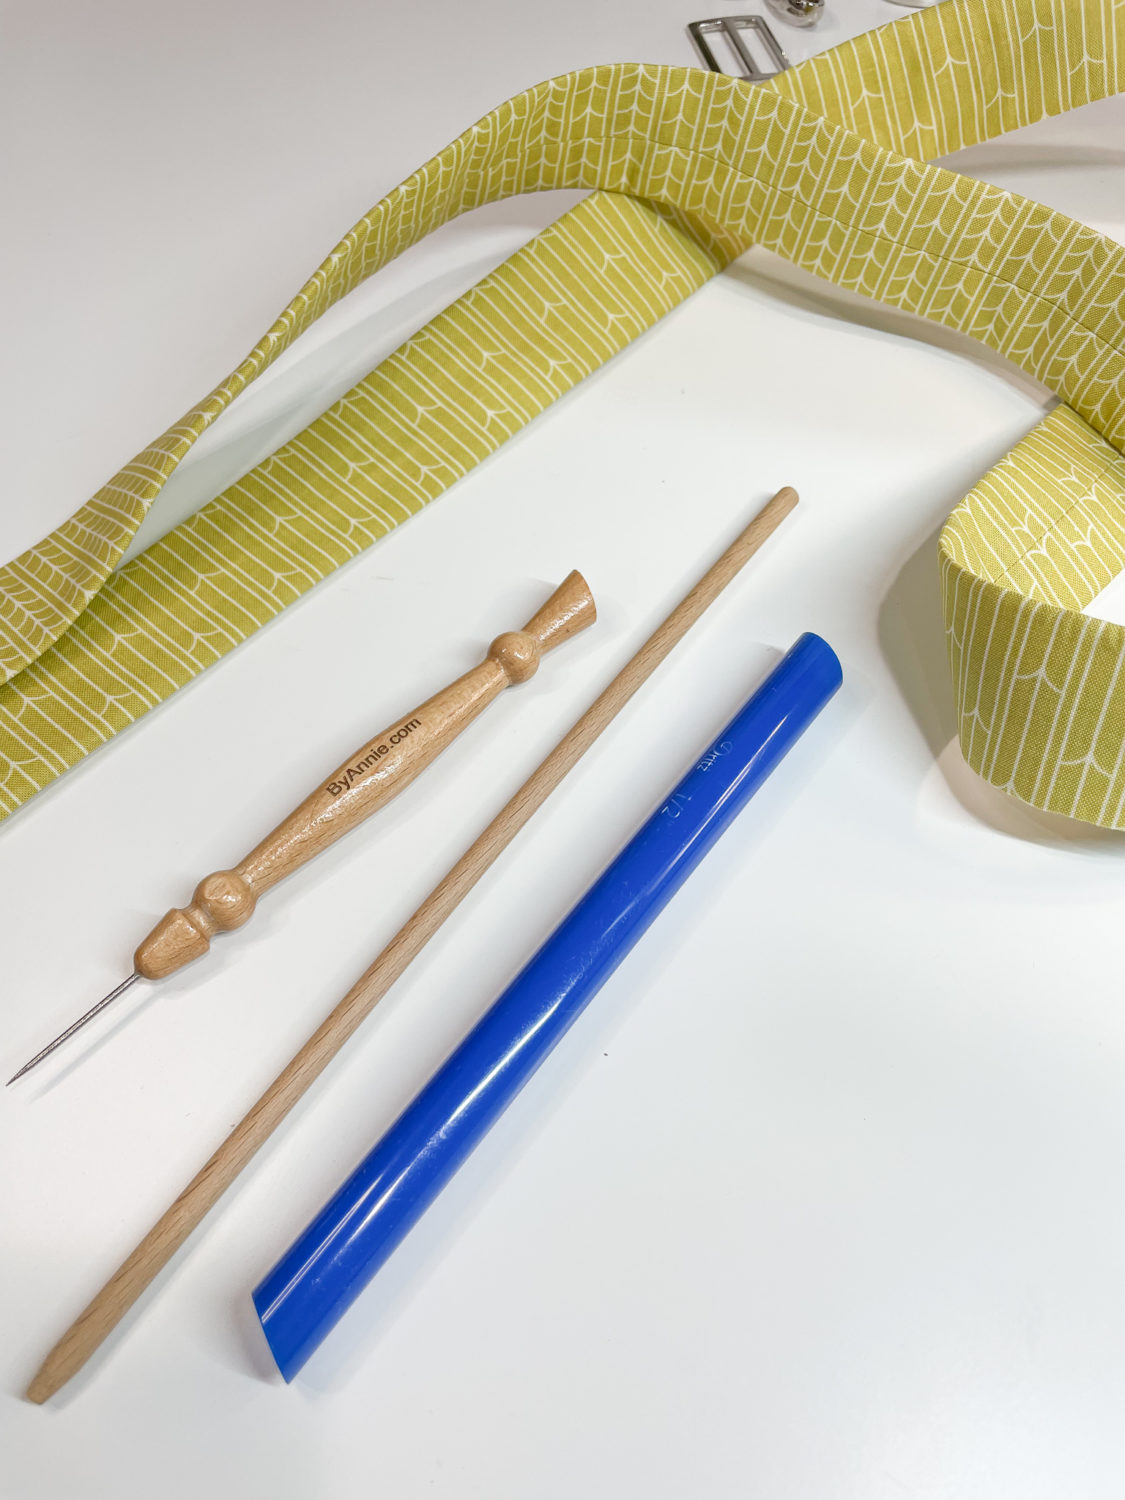
Above are the tools I love to use when making my straps! Here are the links if you want to pick up these items to use for your own straps!
Dritz Tube Turner and ByAnnie’s Stiletto and Pressing Tool.
On the seam side of the Carrying Strap, mark a line on 4” up from one of the end.
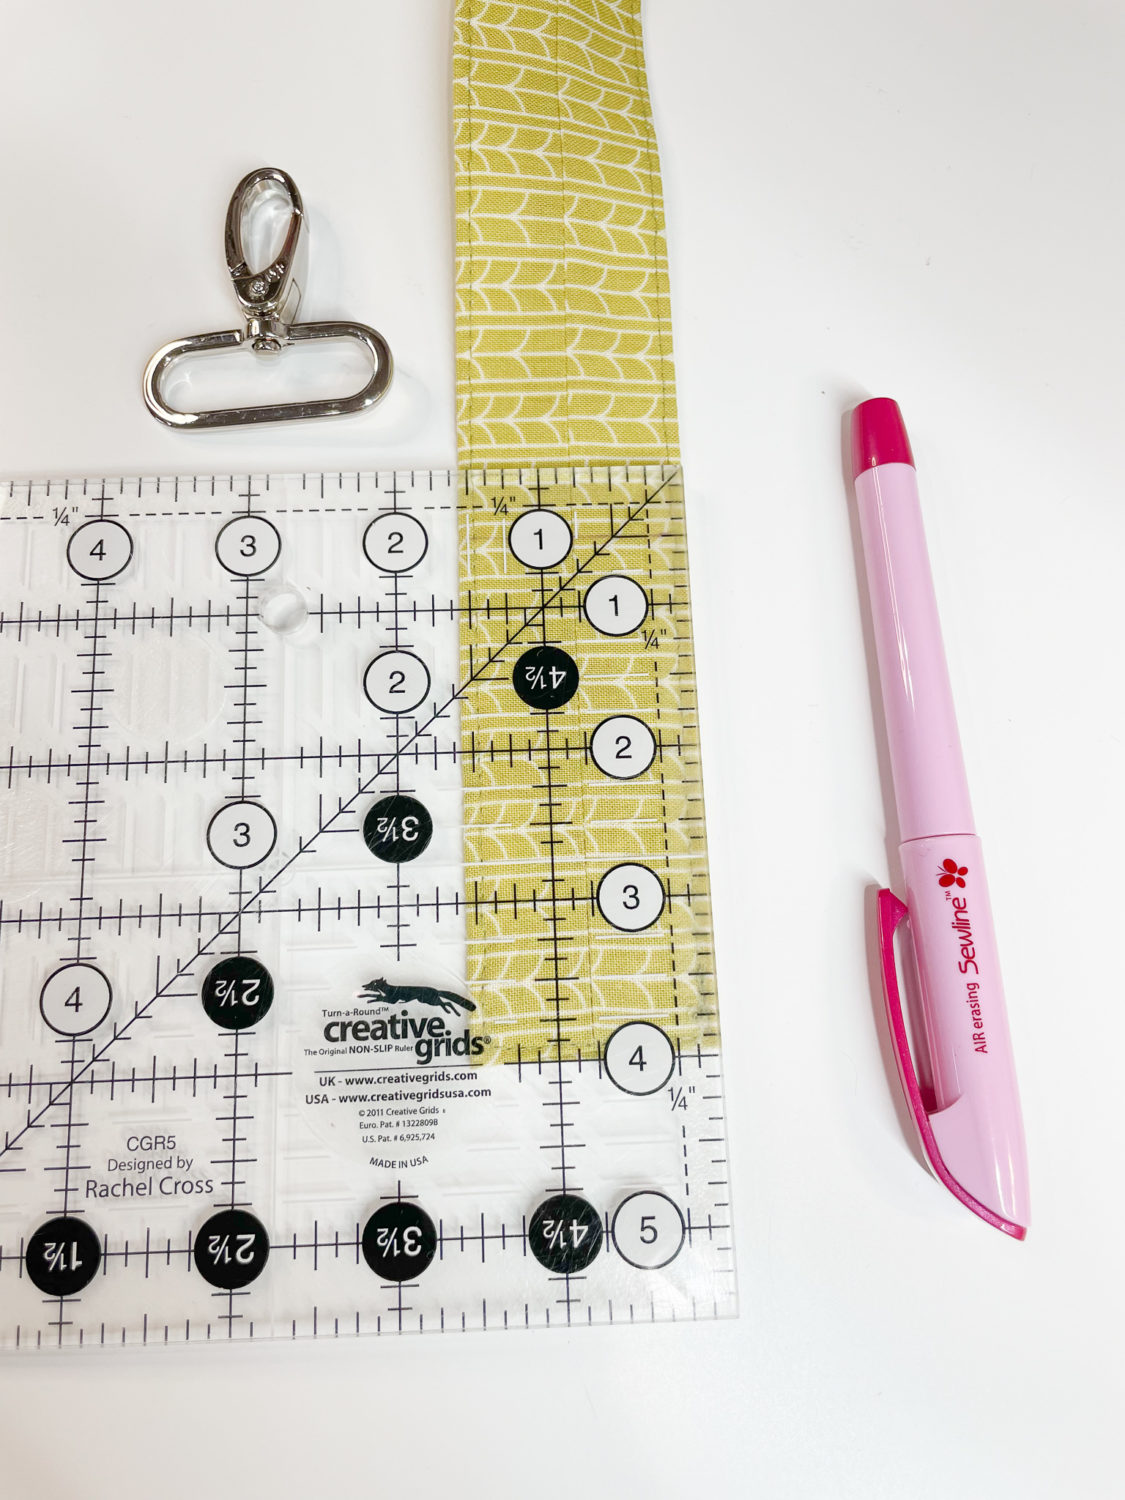
Then flip the strap over and mark a line 1.5” up from the non seam side of your Carrying Strap.
Thread on the Swivel Hook. Bring the seam sides together and match the end with the 4” marked line. Clip in place.
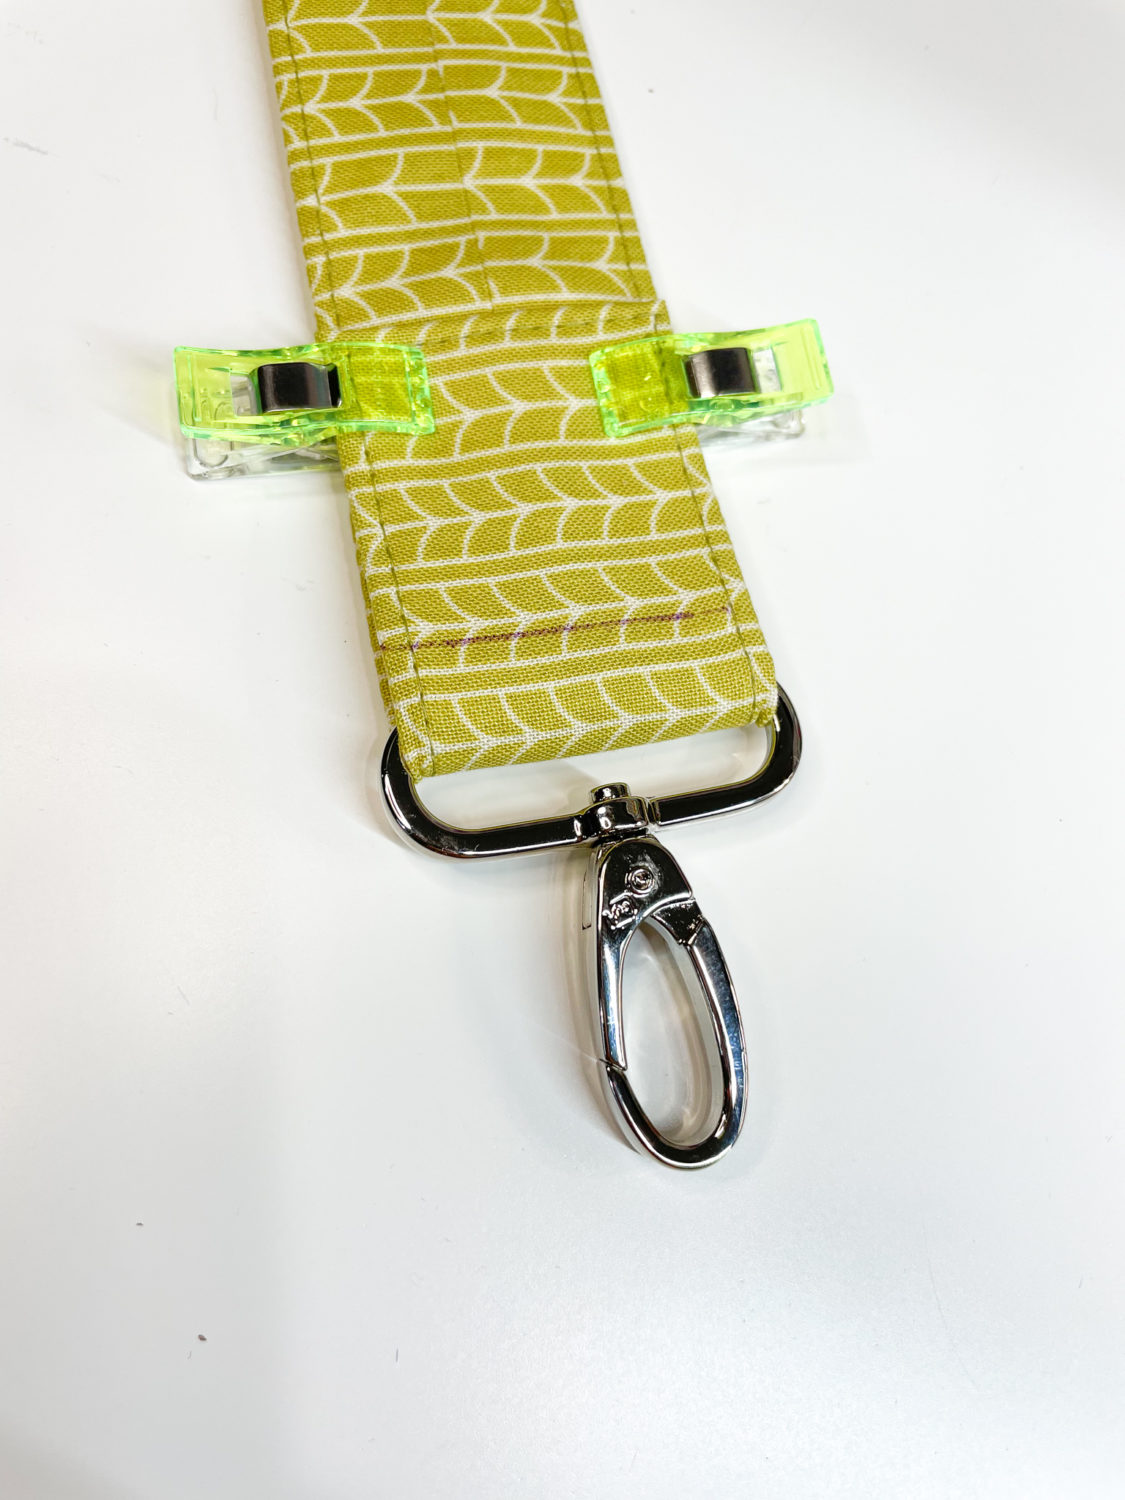
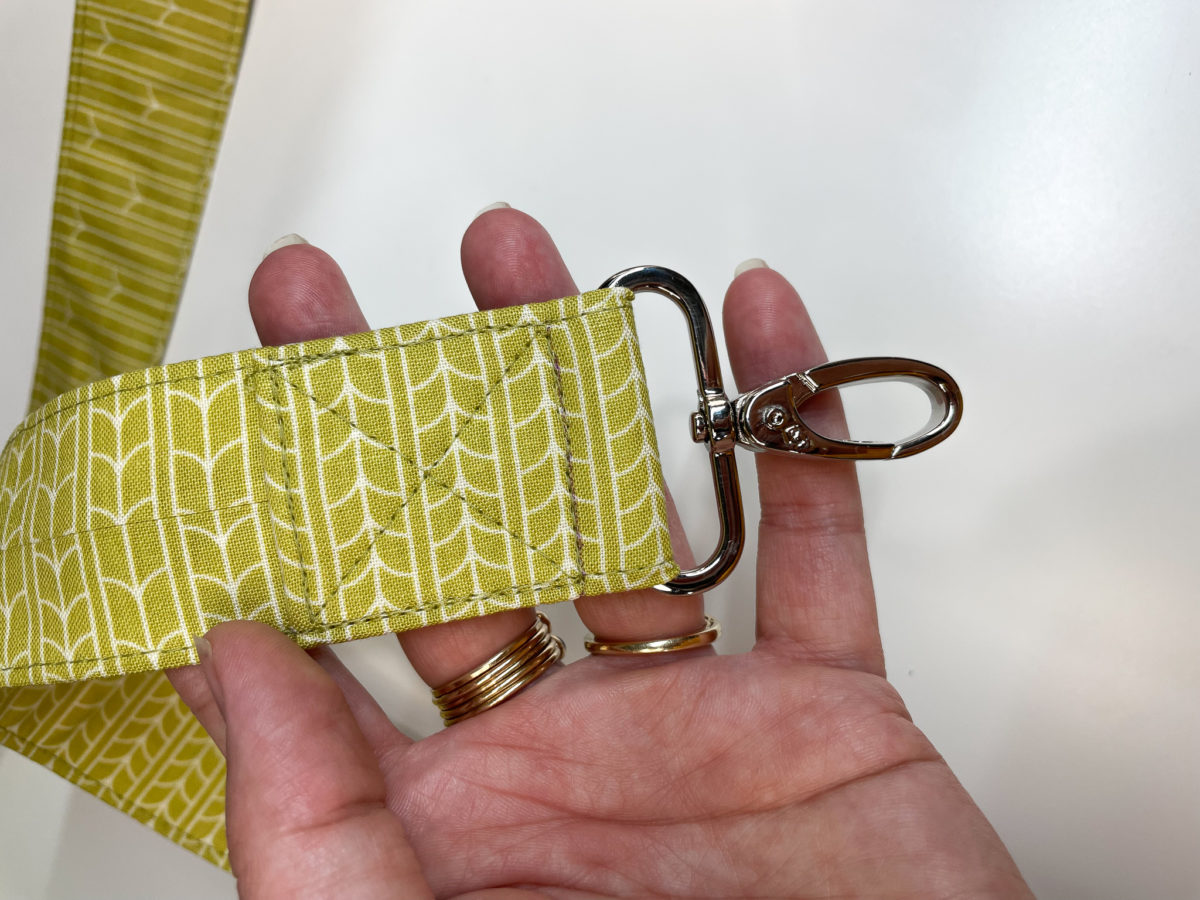
Sew a 1.5” square along the previous topstitching lines and across the marked 1.5” line. Sew an X through the square to secure. One end of your Carrying Strap is complete!
Now take the finished end of the Carrying Strap (seam-side down) and thread strapping through the Slider, up from the back, through the top opening, over the middle post, and down through the front of the bottom opening. Thread strapping through the remaining Swivel Hook and around so the seam sides of the strapping are touching.
Thread the strapping back up through the bottom side of the slider, over the middle post, and down through the top. Pull the strapping past the middle post and fold strapping back on itself so the seam sides are facing out.
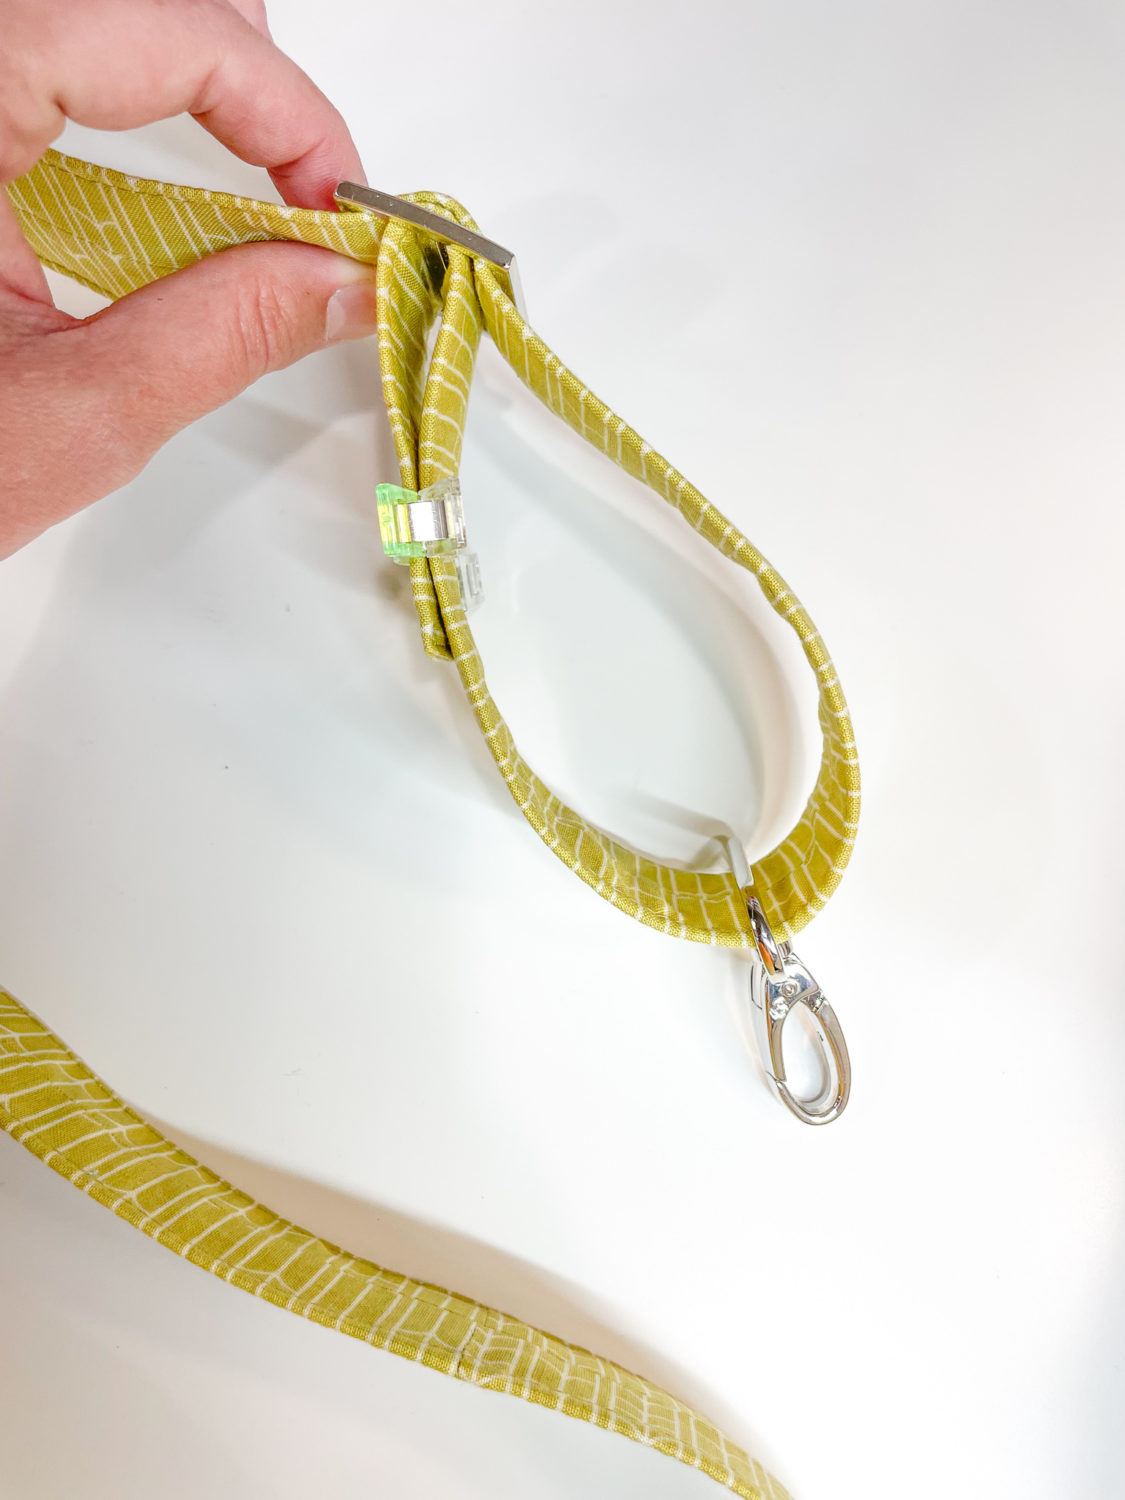
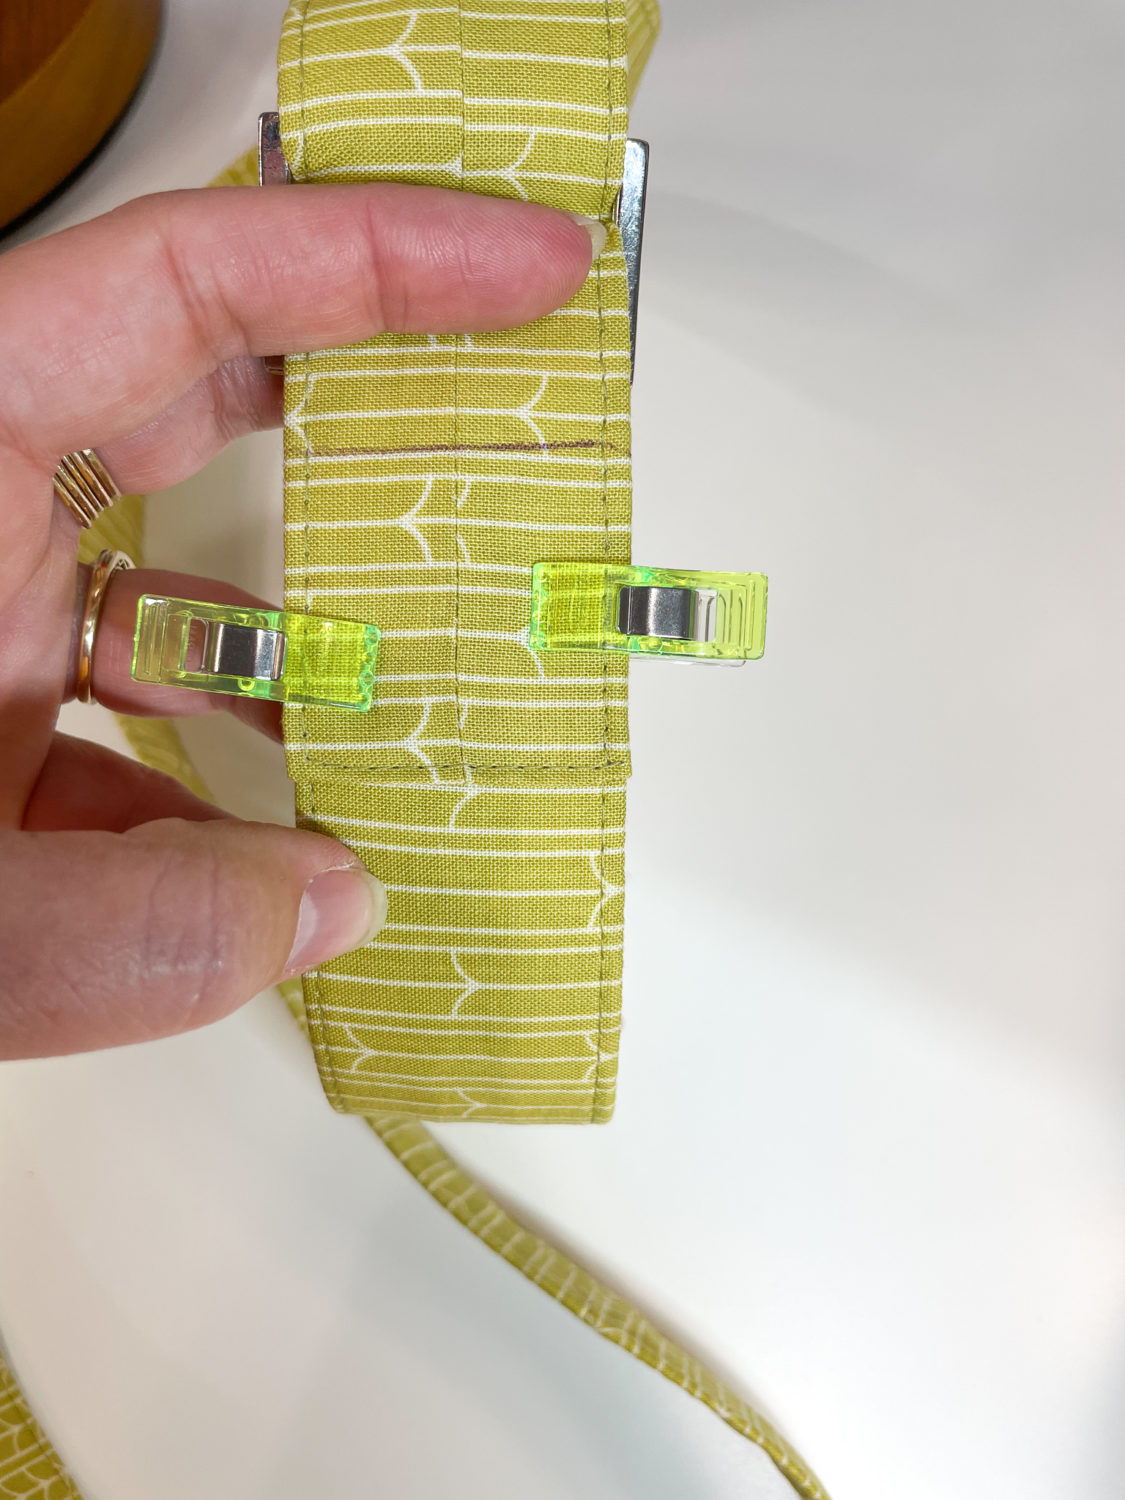
Mark a line 1..5” up from the end of the Carrying Strap and stitch an X through the bottom two layers of strapping just as before. This now completes the addition of the hardware to your Carrying Strap!
Attach the strap to your Patchwork Duffle and CELEBRATE! You now have a carrying strap for your bag!
❤️