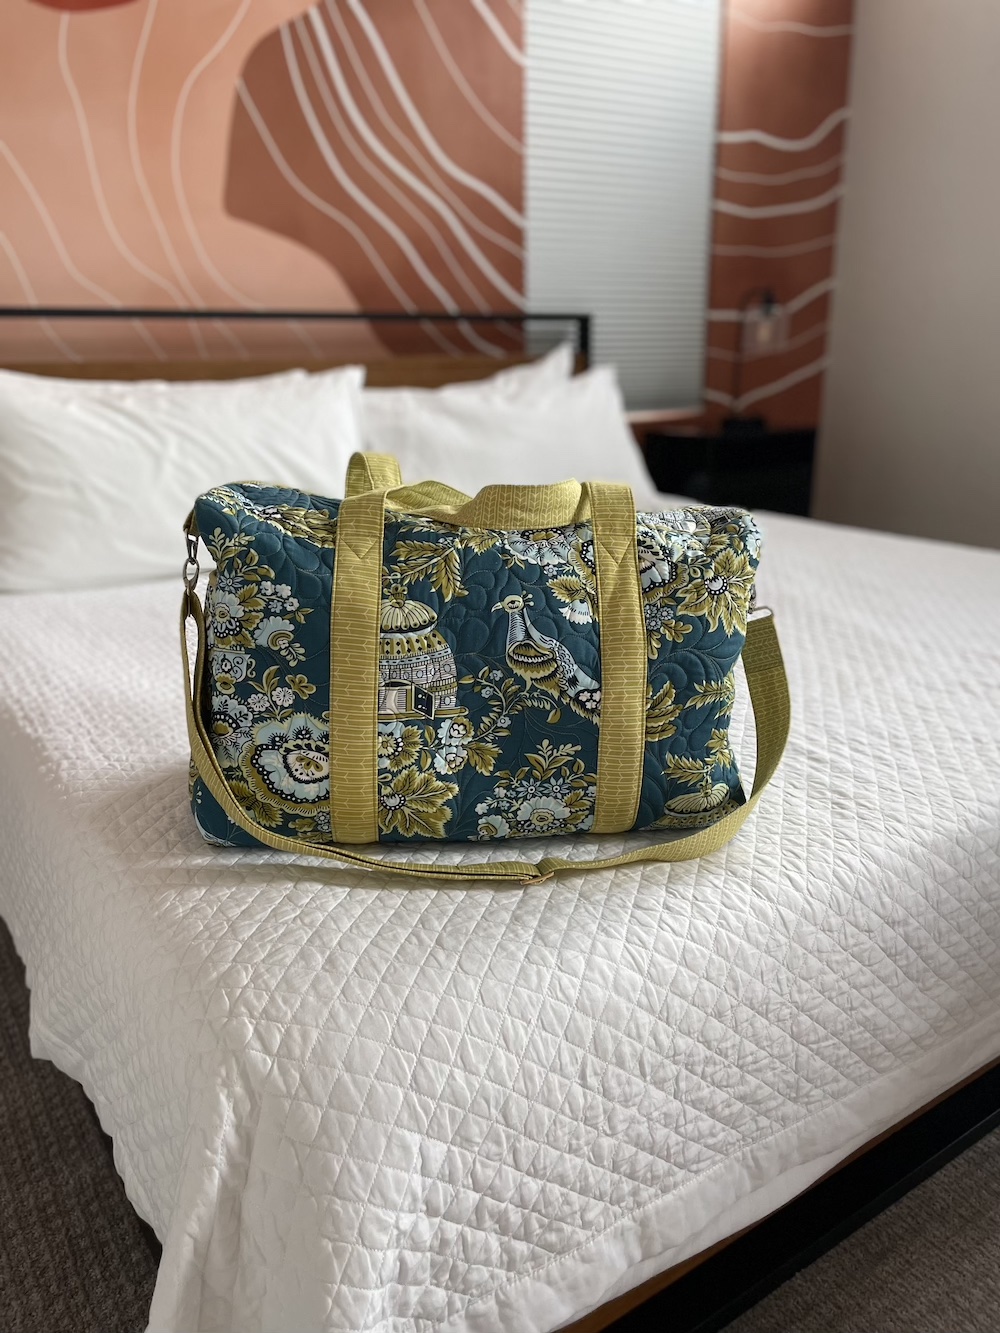
Handles and Bindings! This week we will be making our handles and attaching our pocket and zipper bindings. I’ll be sharing different tools and techniques you can use for attaching your binding as well as different options for your handles.
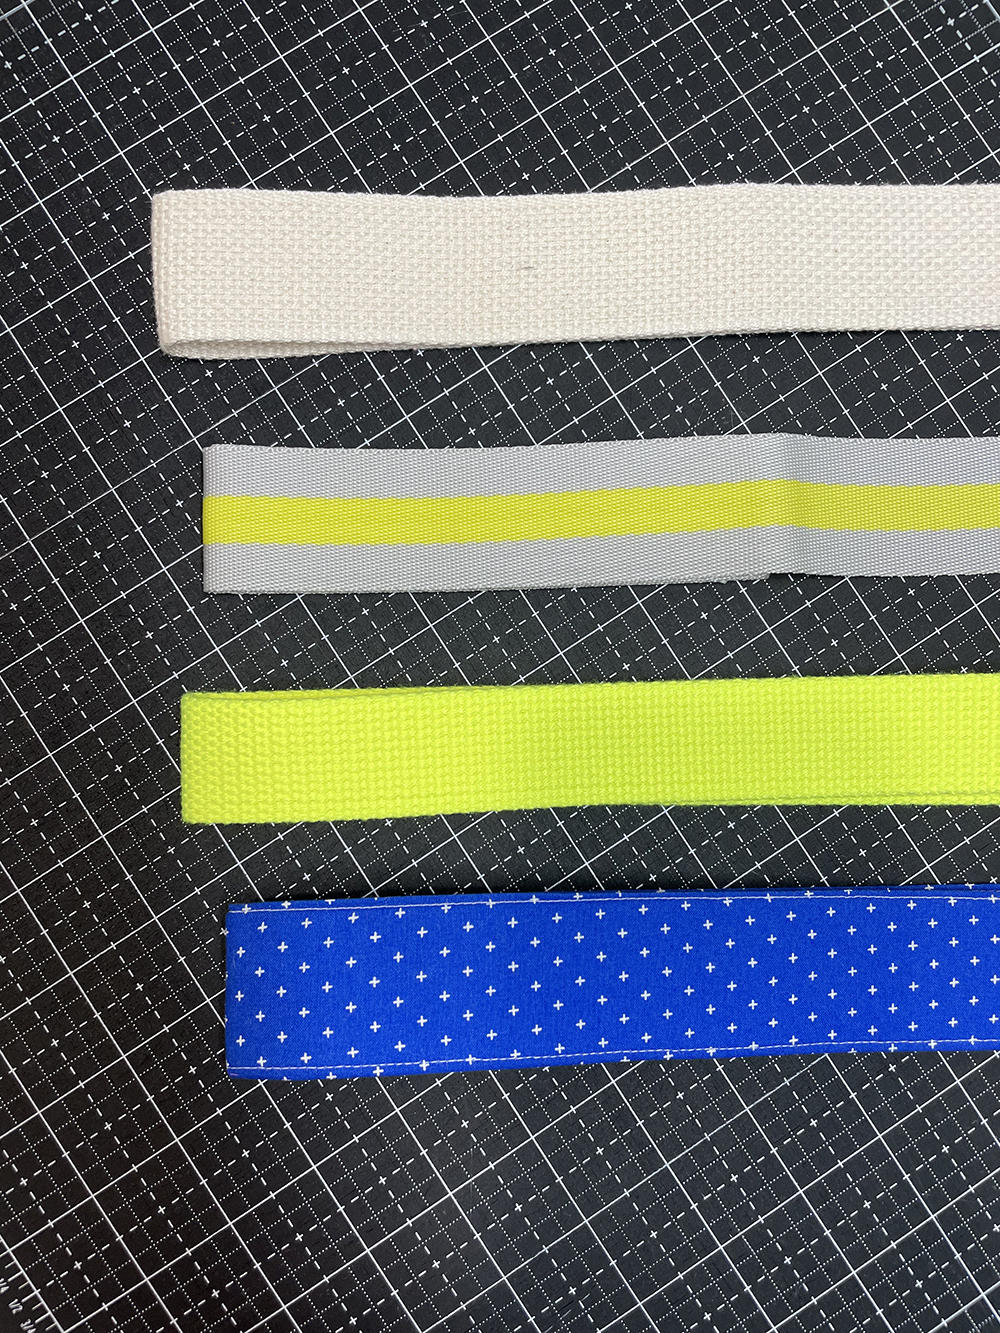
HANDLE OPTIONS
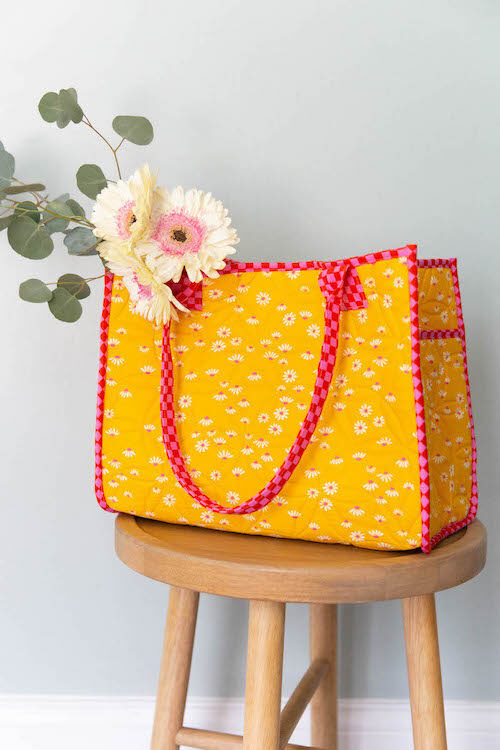
Are you using a finished handle webbing? Or covering some strapping with fabric? You have options and both are good! I am really loving seeing all the webbing options out there! I now have 22 colors of finished cotton webbing in my shop if this is the route you choose.
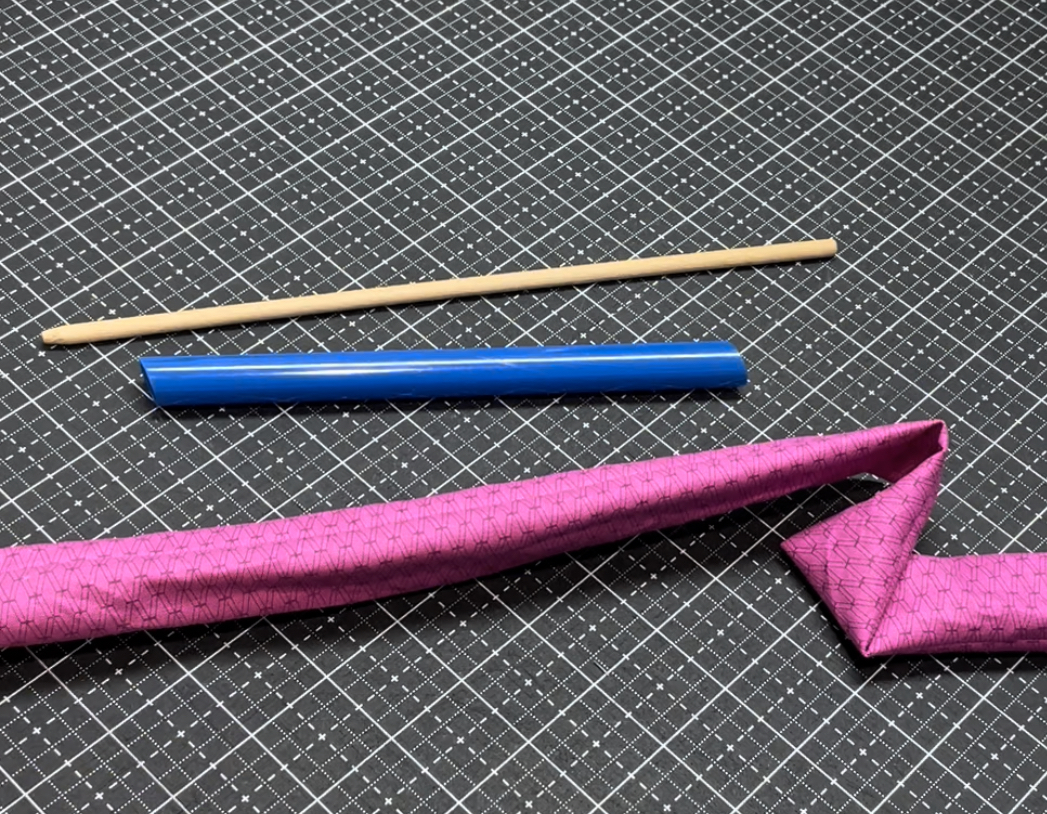
FABRIC COVERED STRAPPING
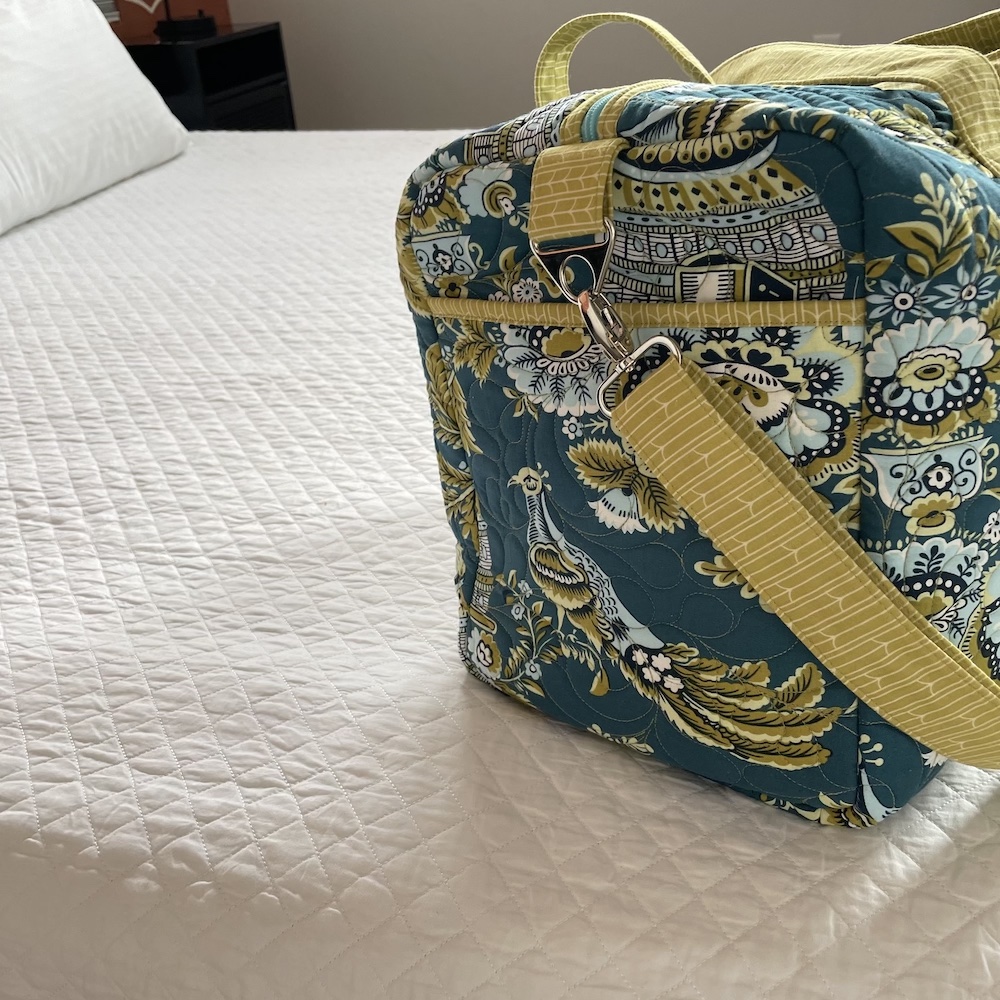
Covering a polypro strapping with fabric is one of my favorite ways to add more variety to your bag. I love fabric so any way to incoporate just one more print excites me. If you are the same this may be the technique for you. Using a Tube Turner for this isn’t required, but in my opinion is a GAME CHANGER when flipping tubes. The handles on this bag are made with one long piece, so it can be a pain to turn that tube with a safety pin. I will be sharing A video about this on my IG this week so stay tuned. All the videos will be saved to my Patchwork Duffle SA Highlight in my profile so you can always refer back to them.
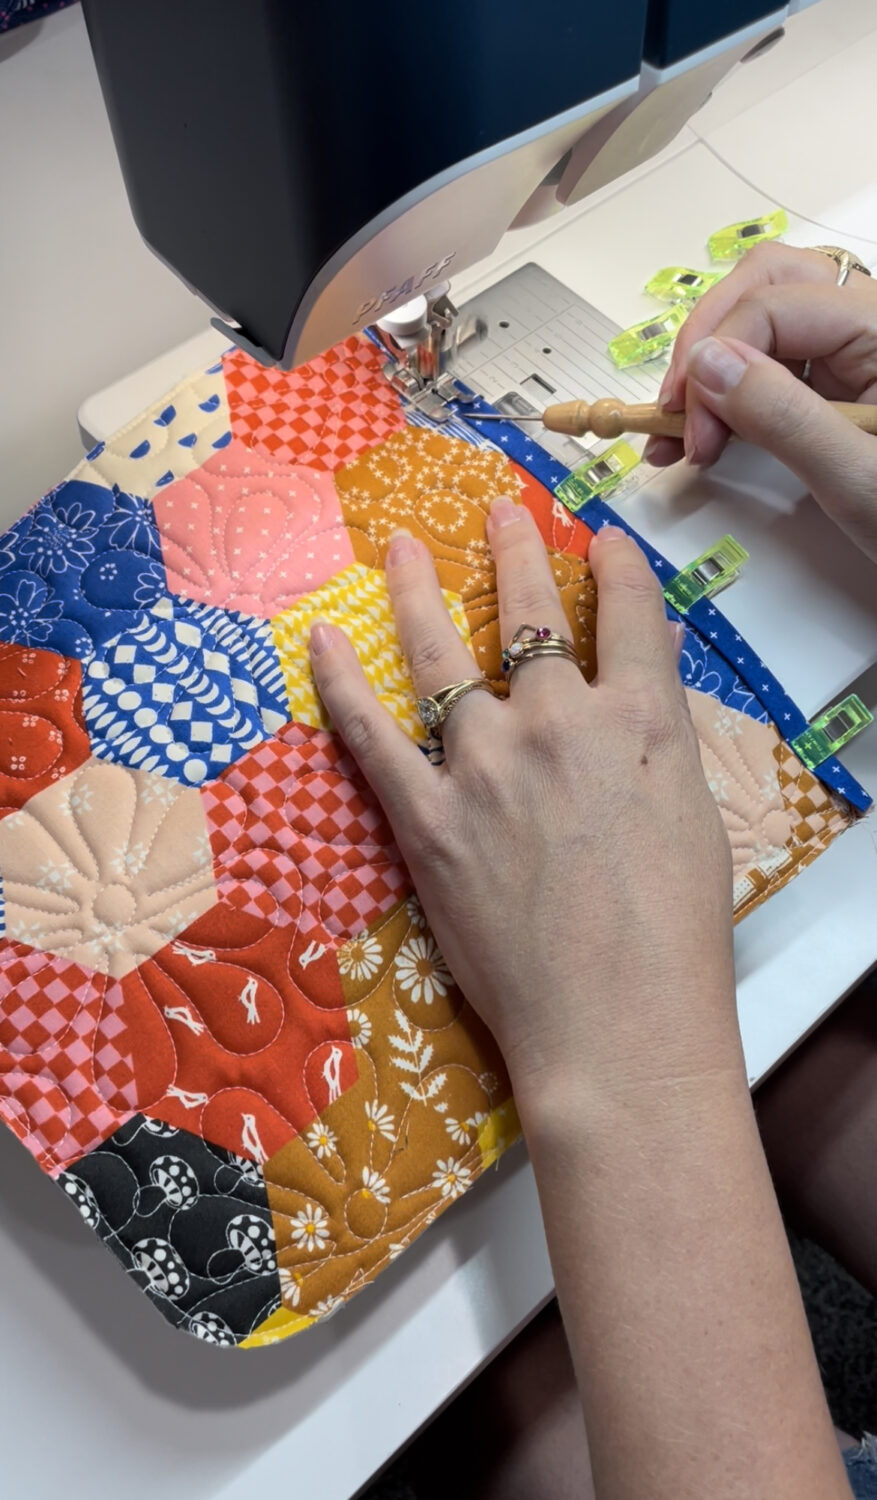
BINDING METHODS
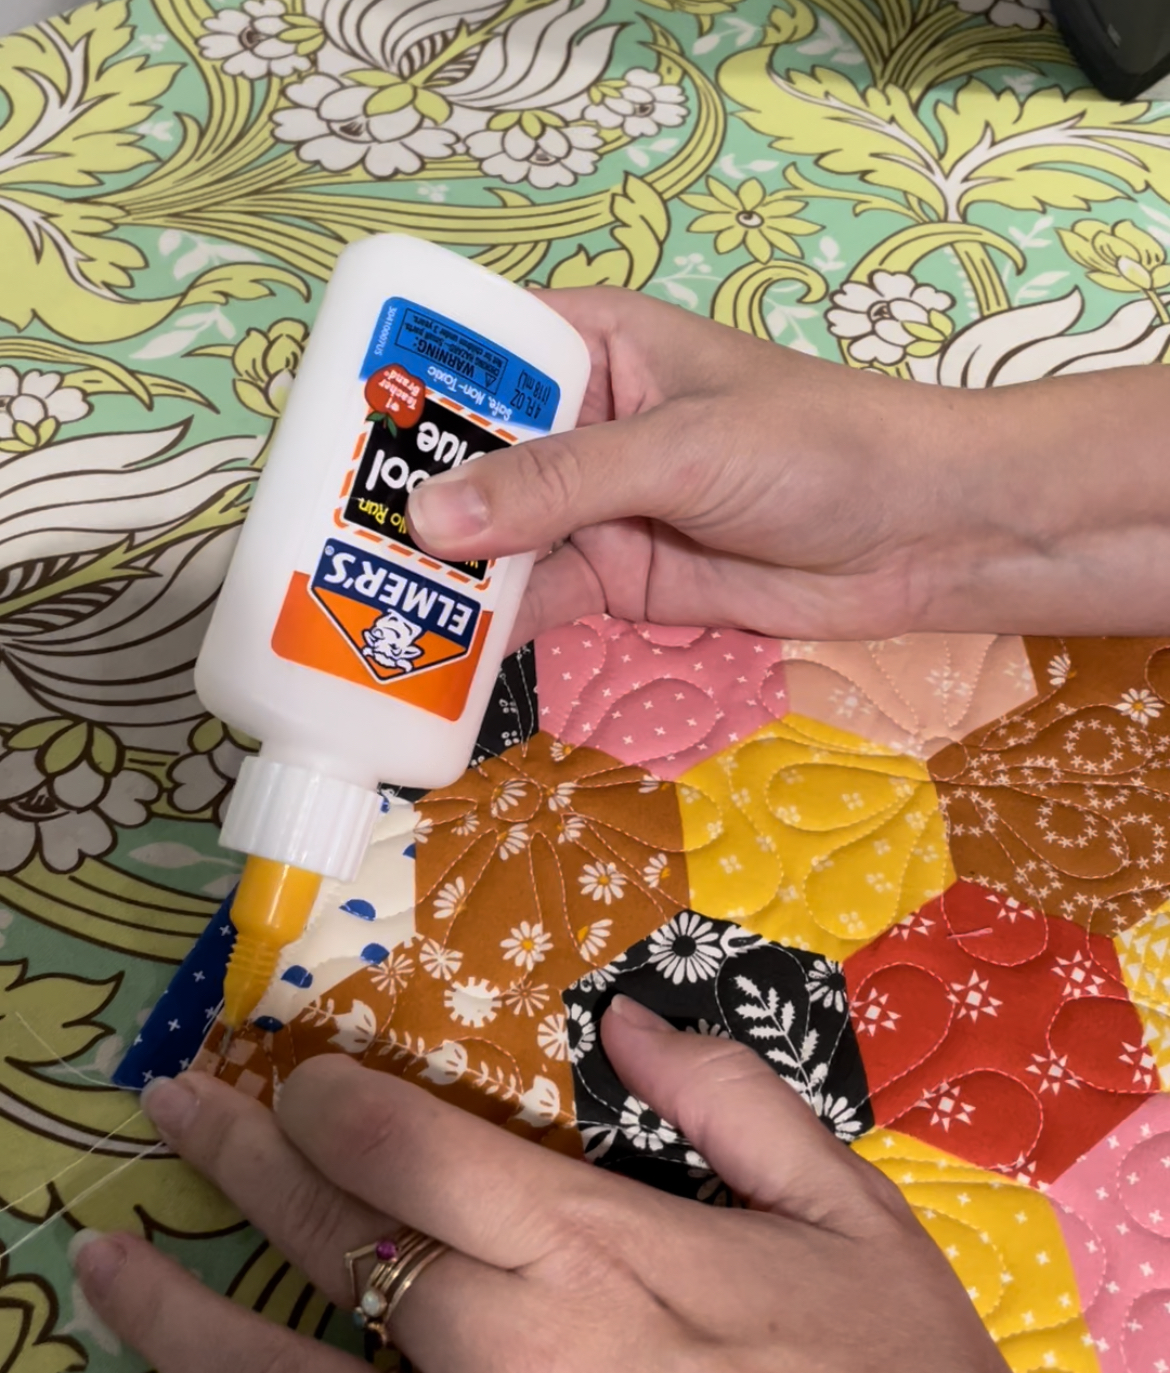
I’ve always done my bindings the same way. Roll fabric over use some wonder clips and stitch down using my trusty stiletto. If you haven’t gotten a stiletto yet for your notion collection, I recommend THIS one. I also love these little Pinmoor stiletto protectors when not in use.
I had a few people suggest glue basting. I loved the way it kept my binding in place so nice and straight. You might want to give it a try. @penandpaperpatterns has some great glue tips to make this process even easier.
WANT TO ADD A CARRYING STRAP?
This is a great time to decide if you want to add a carrying strap to your bag. Be sure to check out the Tutorial here on my blog for all the details. If you still need to grab a hardware set, I have them available in my shop.
THIS WEEK’S SPONSOR
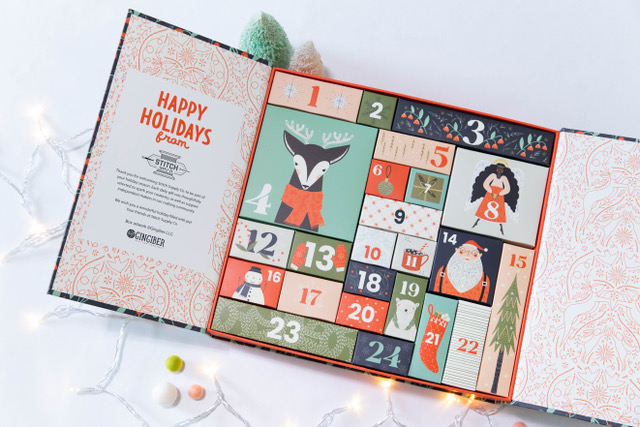
We have a special treat this week for our sponsor giveaway! Have you heard of Stitch Supply Coand their famous Advent Calendar? I am so excited to share that we will be giving away one of these to one of you! That said, the deadline to order the calendar this year WITH customization is Oct 1st. So I will be picking a winner EARLY this week. The winner will be selected Friday so that they can have time to get their customization in for the calendar. So try and post your progress early this week for your chance to win! Big thanks to Stitch Supply Co!
Be sure to post your progress on IG to the #patchworkdufflesewalong hashtag to be entered for our week 3 giveaway, sponsored by Stitch Supply Co.
This week we will be making our handles and assembling the bag. Are you excited to finish this up? I hope the end result of this bag leaves you wanting to make more!
HANDLES:
Are you using a finished handle webbing? Or covering some strapping with fabric? You have options and both are good. I am really loving all the webbing options I've seen shared. I have a few colors of finished cotton webbing in my shop if you need a quick option. The pattern covers instructions for both versions.
FABRIC COVERED STRAPPING:
Covering a polypro strapping with fabric is one of my favorite ways to add more variety to your bag. I love fabric so any way to incoporate just one more print excites me. If you are the same, this may be...
Welcome to another Sew-Along! I'm so excited to be sewing another bag with you!
The Schedule
Collect Supplies
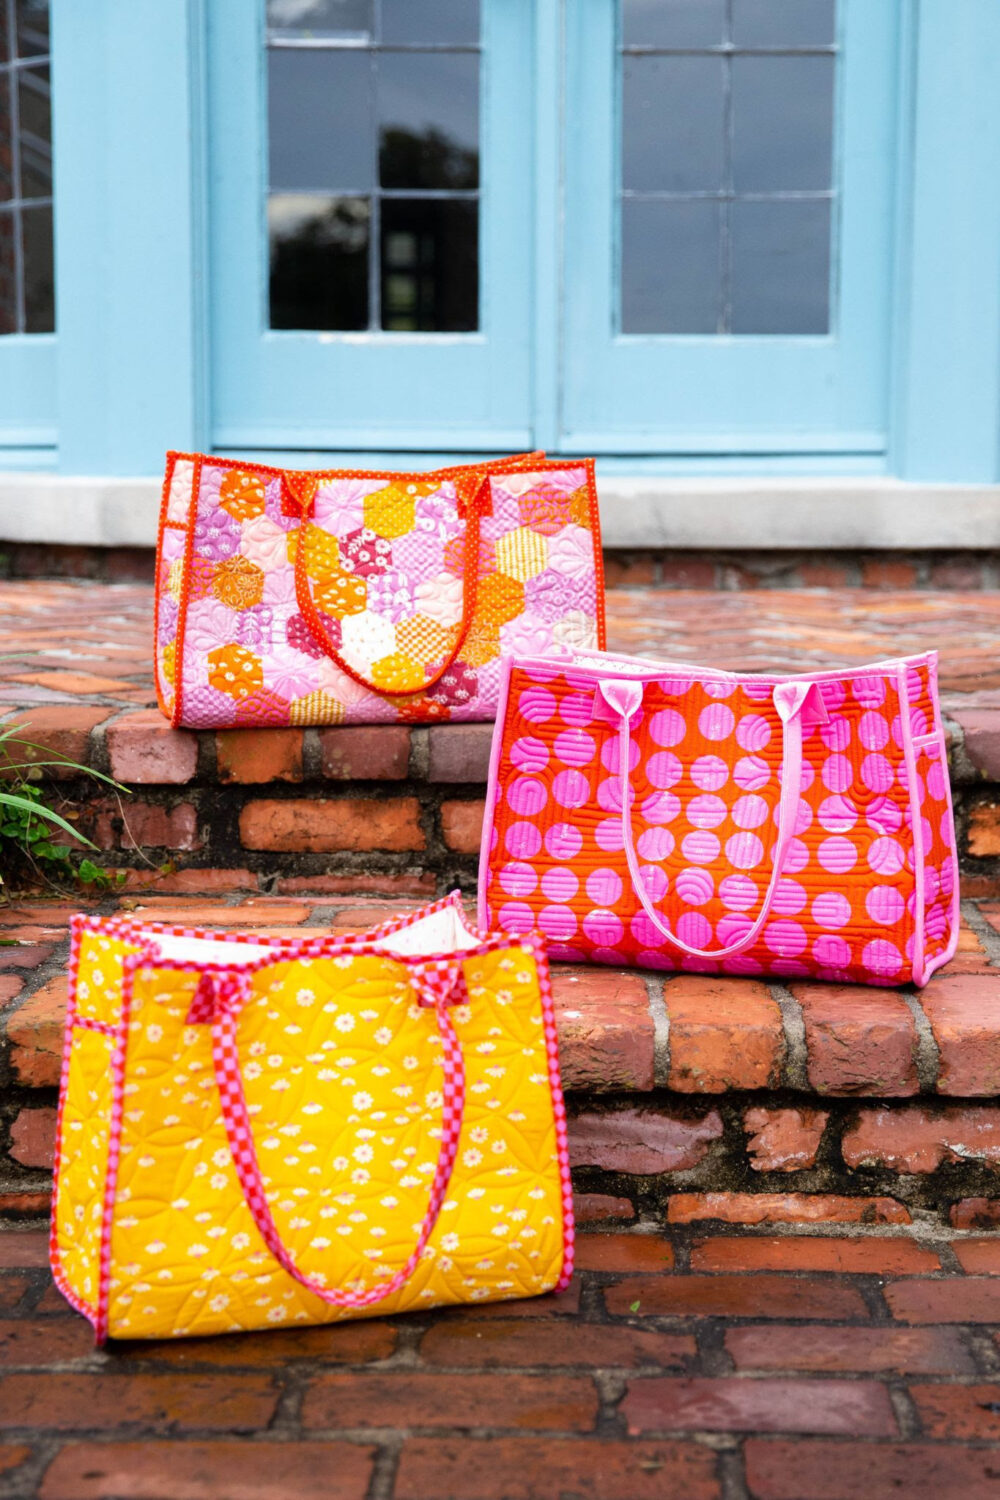
Do you have everything you need? I designed the bag to be made with Soft and Stable, but I have seen a couple samples interfaced with SF101 fusible interfacing and then quilted up with batting. So you have some options and liberty with how you construct your bag. If you have batting/interfacing lying around, those are great options. I love Soft and Stable for the structure and stability. I haven't made a tote without it yet. In case you need it, I carry both options in my shop:Shop InterfacingShop Soft and Stable Have you decided which handle option you are going to make for your tote? The pattern includes instructions for...
Don't you just love puppies? I love puppies because they small and cute. It's like all of the good things about a dog, but in a more manageable size. If you like puppies like I do, you might also like my Patchwork Duffle Mini—which is a smaller and more manageably-sized version of my Patchwork Duffle pattern.
This pattern has felt like it's been in the works for a while now. Shortly after the Patchwork Duffle was released, I had people wondering about another size variation. All you who have made the extra large and extra spacious Patchwork Duffle know you can fit a small toddler inside. Well now you have the perfect sized bag for your Toddler's use, or a perfect companion travel bag for your Patchwork Duffle.
Like the...
What a fun few weeks we shared together making duffles! I have loved seeing your finished bags pop up on Instagram! Thank you for sharing and for sewing with me!
I'm so excited to share some fun additions that Makers made during the sew along and wanted to credit them and link to them so you could reference back to these fun ideas and additions for any of your future Patchwork Duffle making!
INSIDE POCKET ADDITION
I loved this idea of adding a mesh pockets to the inside of the End Panels. Mesh is a great way to add a pocket without adding more bulk into your seams! You can bind the mesh with a fold over elastic or just a piece of cotton fabric. @_indoor_cat shared photos of her addition! check her Instagram...
Welcome to the first week of the Patchwork Duffle Sew-along. Excited to be sewing along with more than 1500 of you! I am excited to document our tips and tricks here on the blog for you all the have access to and reference for future use!
Friends, Hope you've found some shops to grab your supplies. If you haven't be sure to check out Stitch Supply Co. for some curated bag kits! I have supplies in my shop along with some helpful bag making tools. If you have some scraps start cutting them up! This Patchwork Duffle is perfect for using up those quilt scrap leftovers.
Grab the PDF pattern here OR the paper copy here.
THE SCHEDULE
We will be making the Patchwork...
Hello quilty friends,
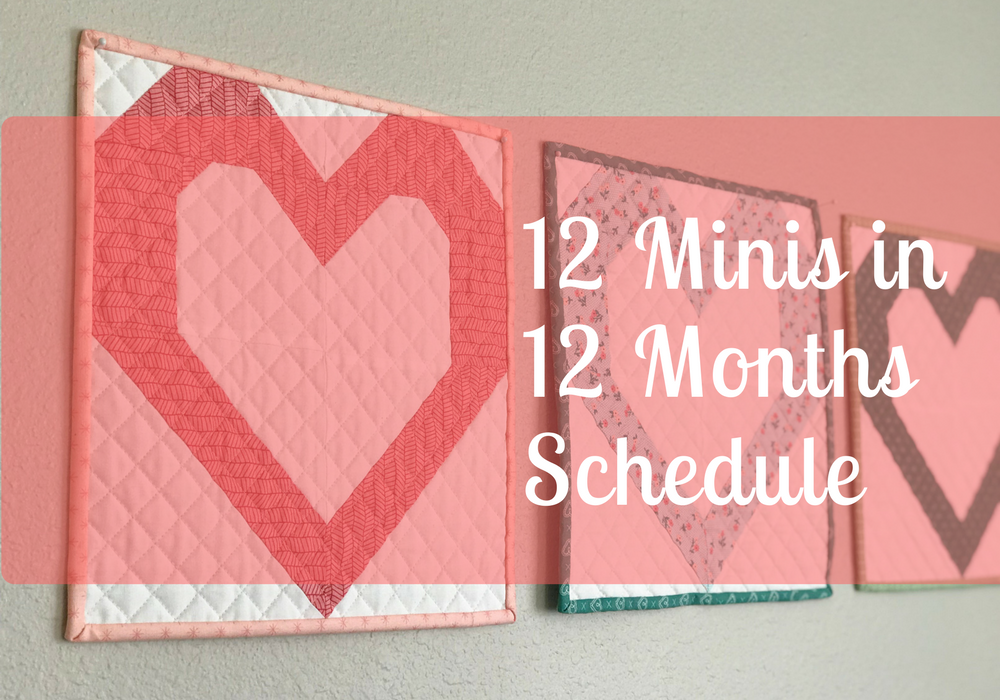
I've outlined below what tips I'm going to cover this year as part of my resolution to create more often with mini quilts. Each month, as I post new tips, I'll link to the post from this page, so you can always come back to this page if you need help finding a post.
January: Introduction
February: Choosing fabrics
March: Cutting tips
April: Needles and thread
May: Piecing & pressing tips
June: Quilting tips
July: Binding Tips
August: Pattern favorites
September: Paper piecing tips
October: English Paper piecing tips
November: Display
December: Final post
I want to give special thanks to the generous sponsors of this sew-along—they are the reason I have so many great items to give away to you every month! You can look forward to fabulous giveaways from:
Lella Boutique
Sassafrass Lane
Moda Fabrics
Quilters Dream Batting
Hobbs Batting
Patterns By Annie
Soak Wash
Superior Threads
Cluck Cluck Sew
Creative Grids
Clover
Jaybird Quilts
Thimble Blossoms
Riley Blake Designs
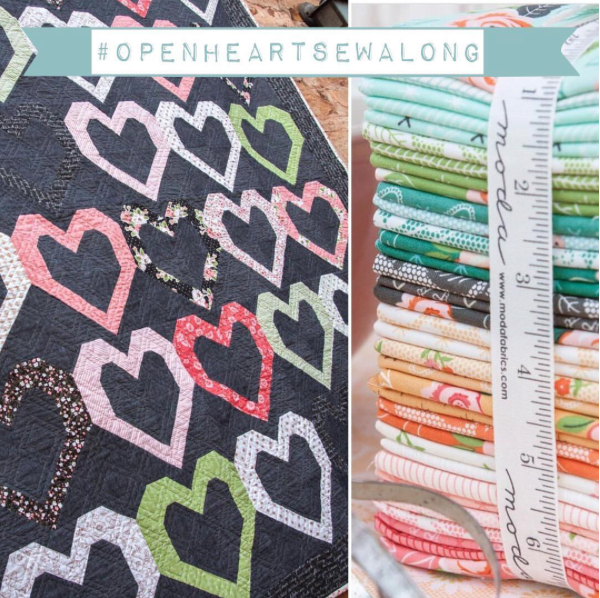
I am so happy that so many have joined in on our Open Heart Sew Along. If you missed the details don't worry, there is still time to join. For the next few weeks we will be sewing the Open Heart Quilt. (If you hurry fast the pattern is still on sale on Vanessa's website for just $5.)
I have been wanting to make this quilt for as long as the pattern has been available. When Vanessa of Lella Boutique released this pattern I was instantly drawn to the title and design. Some of you know I travel to Africa as often as my time and money will allow with an organization called Mothers Without Borders. While there we practice principles such as being present, being intentional, and having an open heart.
Many have also suffered from various heart conditions. I hope this sew along will in a small way bring recognition...